Set up a Campaign
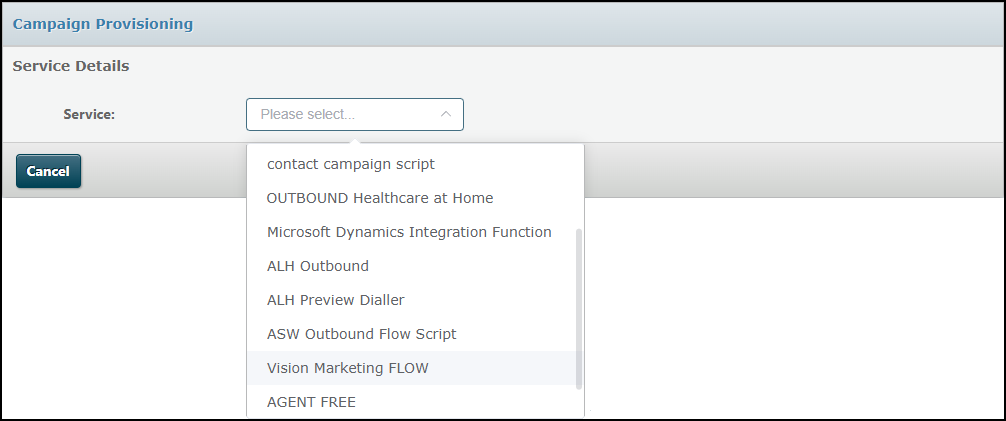
Select the Outbound > Campaign Provisioning menu option, followed by the FLOW service you want to provision.
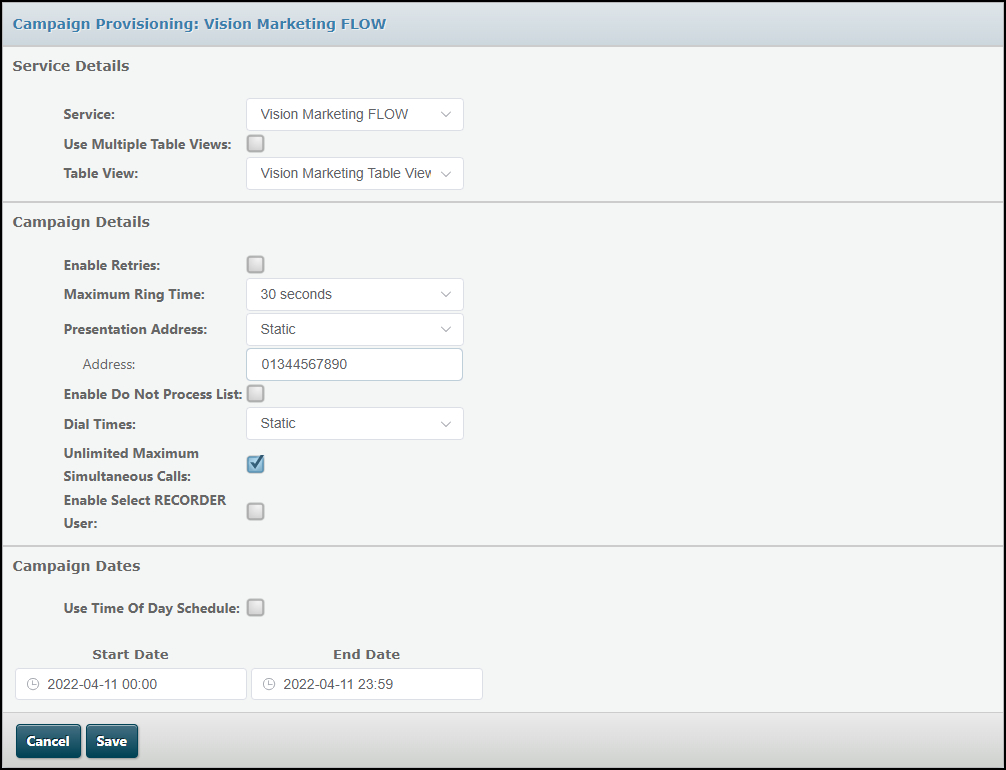
Select a Table View to associate with the campaign.
Service Details
|
Service |
Select the underlying FLOW script using the Service field. For voice campaigns, the FLOW script identifies the queue to be used, and the queue identifies the agent groups, completion code form and DTA script. The FLOW script also identifies the pacing profile. For preview campaigns using multiple table views, the queue identified by the FLOW script can be set separately for each table view, as described below. For agent-free campaigns, the FLOW script identifies the message. Note: the FLOW script included in the drop-down list can be controlled by access profiles. The Service field shows only the 'OUTBOUND' FLOW scripts. Only one script is allowed per campaign. |
|
Use multiple table views |
Use the Table View field to select the table view to be used to provide the contact list. If the campaign will use more than one table view, select the Use multiple Table Views field and use the The % field allows you to set a weighting for each table view. The percentages must add up to 100%. Selecting the Weight table views equally sets each table view as having the same weight. In the following configuration, the campaign will first attempt to dial three records from 'Campaign 1 Table View 1' for every record in 'Campaign 1 Table View 2' until all records have been attempted. Then, it will attempt 'Outbound 1 Table View 1' and 'Outbound 1 Table View 2' equally. Weightings in each priority grouping must add to 100%.
|
|
Override preview dial queue |
For a preview campaign, selecting the Override preview dial queue check box allows you to set each table view to have a different queue, to be used instead of the one identified by the FLOW script. This allows you to handle contacts for a campaign using a single FLOW script, then route them to different queues depending on such factors as the geographical location of the target. Note: the queues identified at table view-level here are used only if the campaign has a preview pacing profile assigned to it. If the campaign is assigned any other type of pacing profile, the queue identified by the FLOW script is used. |
 buttons to select each of the table views in turn and set their priority.
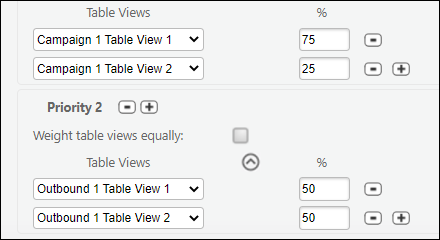
Campaign Details
|
Enable retries |
Use the Enable Retries check box to indicate whether or not retries will be allowed and, if so, assign the campaign a retry profile. |
|
Maximum ring time |
Use the Maximum Ring Time drop-down list to select how long (in seconds) the line will ring before the call attempt is dropped. |
|
Presentation address |
Use the Presentation Address option buttons to specify the CLI to be presented to contacts dialled by this campaign. You can enter a fixed value that will be displayed to all contacts that are called during the campaign or a variable one (using a CLI profile). |
|
Enable do not process list |
Use the Enable Do Not Process List to select one or more tables containing customer records that should not be called. See Excluding numbers from contact lists.
Note: a maximum of three tables can be added to the do not process list. |
|
Dial times |
If calls are to be placed with reference to customer preferences or locations, use the Dial Times field to assign the campaign a dial times profile. To apply different time periods to different contacts, select the Variable option button. |
|
Unlimited maximum simultaneous calls |
By default, the system will have no limit on the number of simultaneous calls the campaign can place. To set a limit, select the Unlimited Maximum Simultaneous Calls check box, then enter an upper limit in the field that is displayed. |
|
Enable select Recorder user |
When the FLOW script used contains the Route to Recorder action cell, you can select which supervisors will be able to access recordings of the calls handled. Select the Enable select RECORDER user check box to display a list of all the contact centre agents set up for your organisation. Highlight each of the agents for whom call recordings using this campaign's FLOW script are to be made available in storm RECORDER. |

Campaign Dates
|
Use time of day schedule |
In the Campaign Dates panel, provide a start and end time and date for the campaign. If required, provide day-of-the-week schedules to govern when the campaign will be active on specific days of the week. |
When you click Save, the system checks how many campaigns you already have configured to run at the same time as this one, and displays a warning message if the limit on the number of campaigns your organisation can concurrently will be breached.
Notes: you cannot share a table view across multiple campaigns but you can assign views of the same table to different campaigns. Ensure that a contact does not appear in different table views of the same table, otherwise the callback, retry and call count for the contact may be corrupted.
Activate the Campaign
Click the Save button in the Campaign Provisioning screen to save the campaign details. Once saved, the campaign will start automatically when the specified start time and date is reached (provided that it does not breach the limit on the number of campaigns that can run concurrently). Campaigns will terminate automatically at the specified end date and time.
Note: for outbound voice campaigns that use an abandoned call cap pacing profile, calls will not be generated until at least one agent is logged in and available.